Using My Print

My Print is a pay-for-printing solution used at Río Hondo College.

Login screen for Rio Hondo College My Print with fields for username, password, language selection, and a "Log in" button.

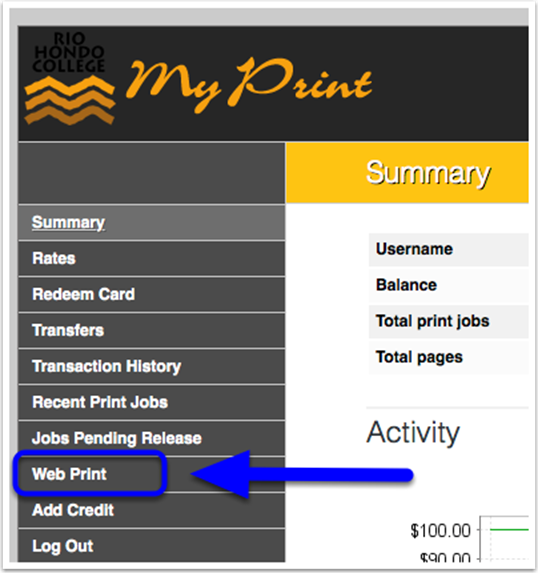
Select Web Print from Navigation Window
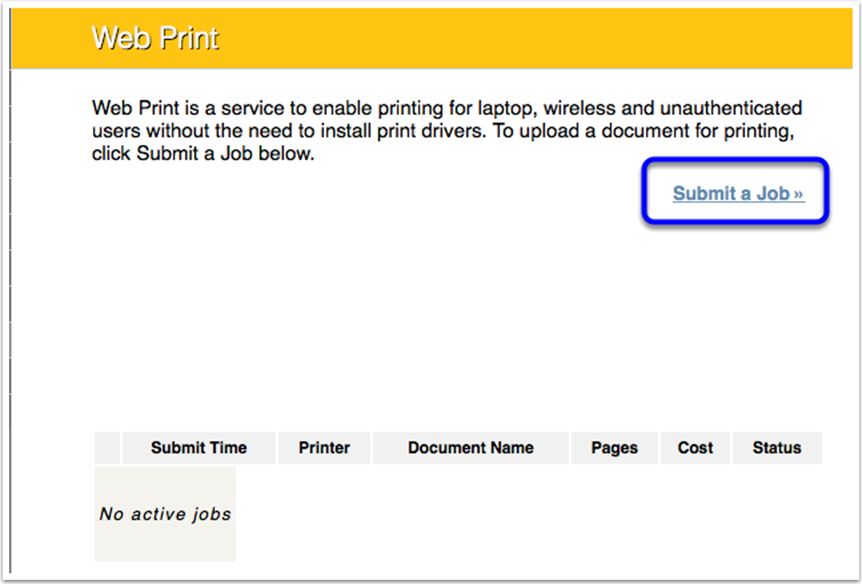
Screenshot of the Rio Hondo College My Print portal, highlighting the "Web Print" option in the left menu with a blue arrow.

Select Submit a Job

Web Print interface showing an option to "Submit a Job" and a table indicating there are no active print jobs.

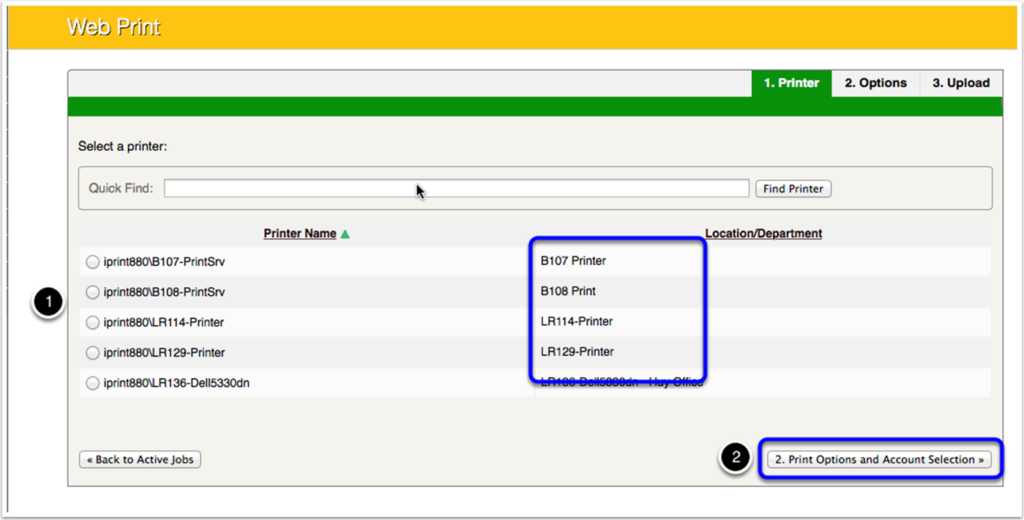
Choose a Destination Printer

Please check that you are printing to the correct printer. Check the room number carefully. You may not be able to pick up a print job from a closed room. Then select 2. Print Options and Account Selection.

Screenshot of a web print interface showing a list of printers to select, with some printers highlighted, and a "Print Options and Account Selection" button at the bottom right.

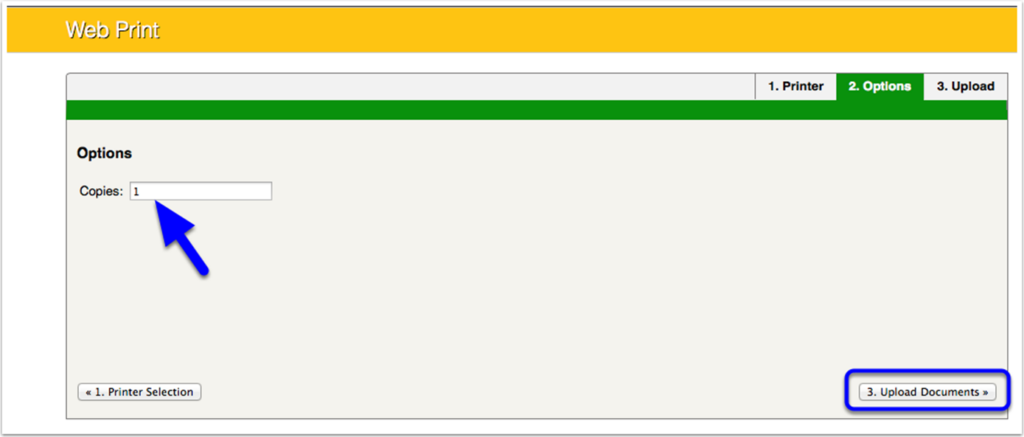
Choose the Number of Copies

Enter the number of copies you would like to print and then select 3. Upload Documents.

A web print interface showing a field to enter the number of copies, with a blue arrow pointing to “1,” and a button labeled “3. Upload Documents.”.

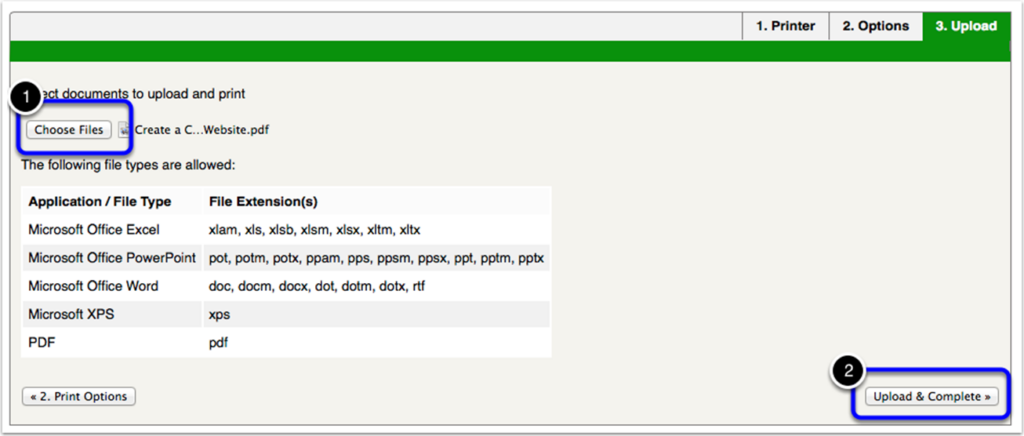
Upload Your Document(s)

Select Choose Files and navigate to a file on your computer. If the document is currently open in your editor, please ensure that you have saved the current version. Select Upload & Complete.
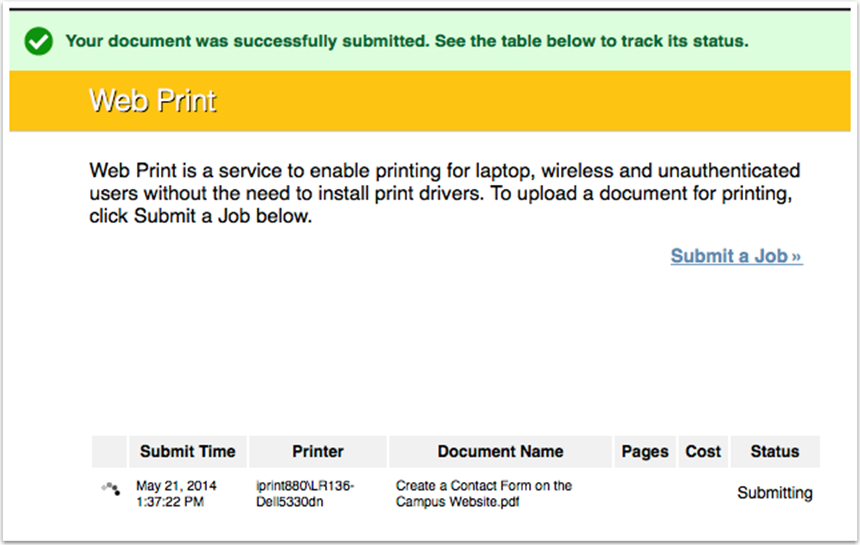
A file upload interface showing a “Choose Files” button to select documents and an “Upload & Complete” button to finish, with supported file types listed in a table.

Success!

You can see the status of your job on the confirmation screen. Please go to the printer and collect your job.

Screenshot of a Web Print confirmation page showing a successful document submission and a table listing print job details such as date, printer, document name, and status as "Submitting.