Step 1: Make a List of Classes You Want to Add
Write down the CRN for each class you want to add. You can find the CRN’s in the current Río Hondo College Class Schedule.
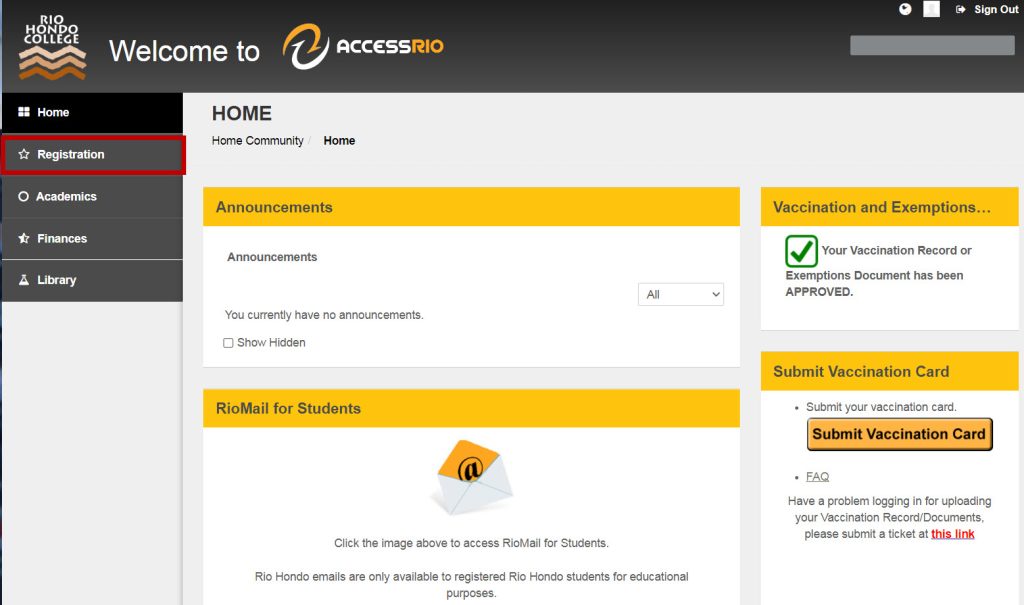
Step 2: Log Into Your AccessRío Account
Step 3: Click on the “Registration” Tab
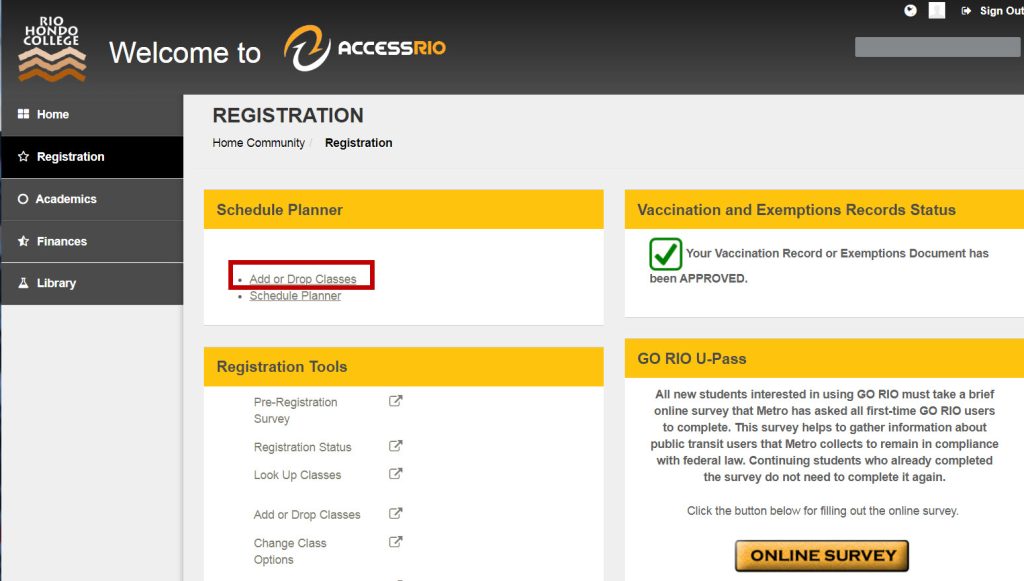
Step 4: Click the “Add or Drop Classes” Option
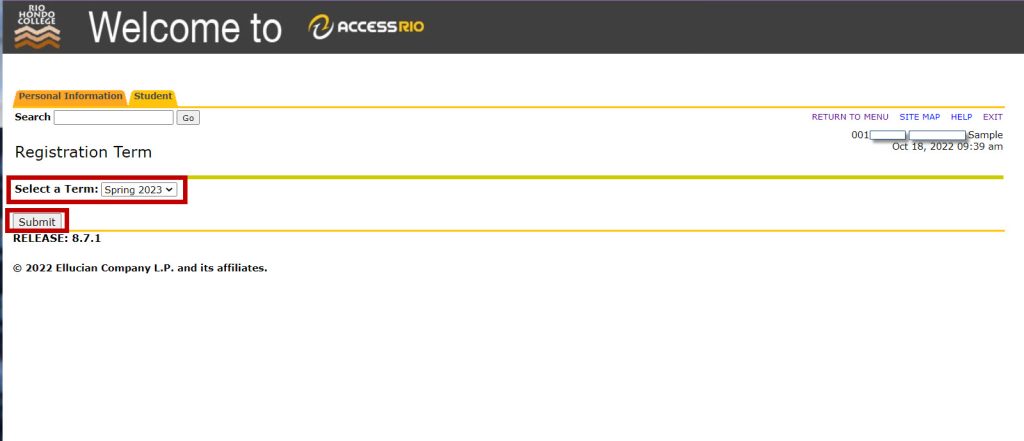
Step 5: Select the Term You Want to Add Classes For and Then Click the “Submit” Button
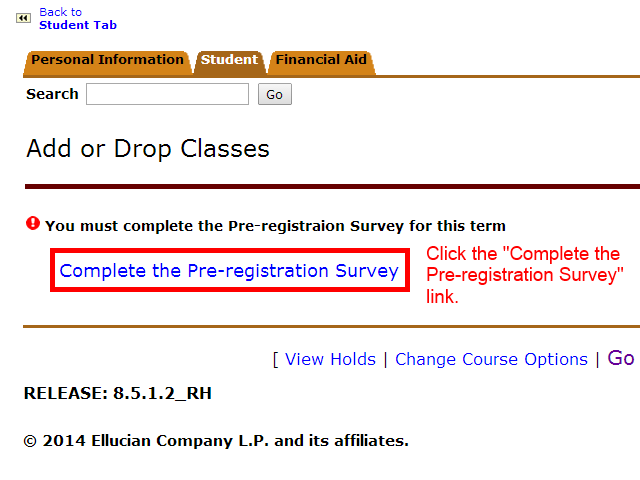
Step 6: Click the Complete the Pre-registration Survey Link*
*You will only have to do this once per semester. If you have already completed the Pre-registration survey you will need to skip ahead to Step 11.
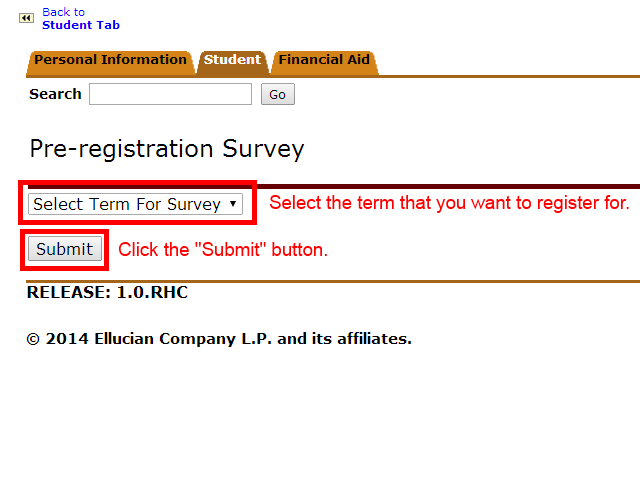
Step 7: Select the Term You Want to Register For
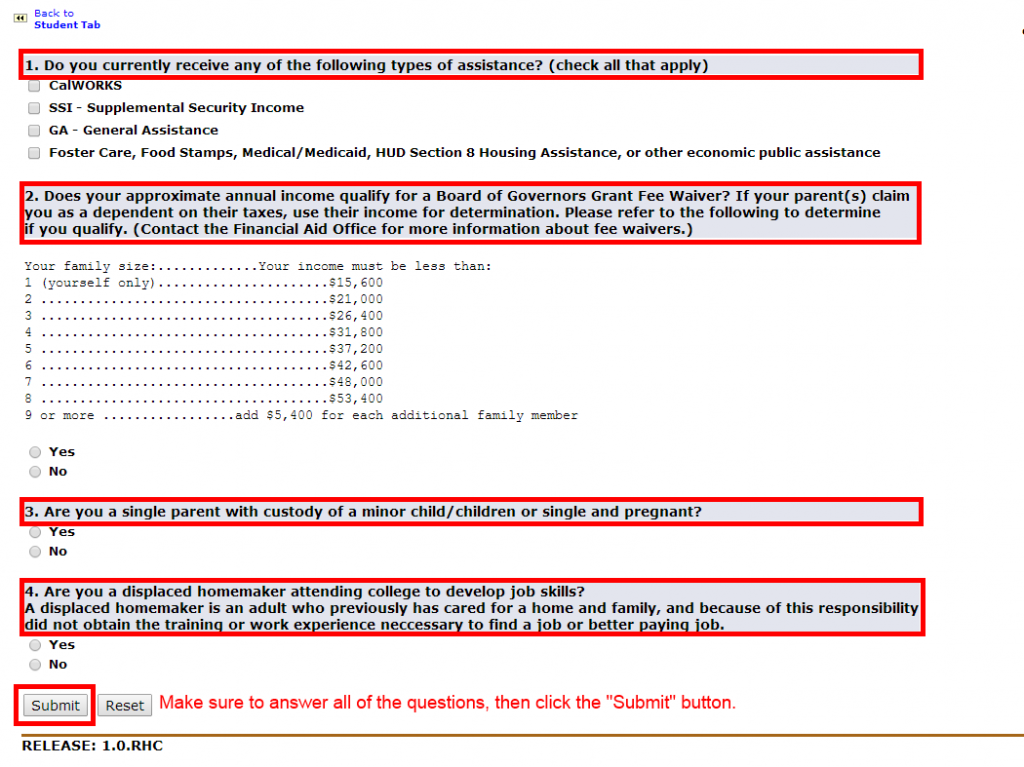
Step 8: Complete the Survey
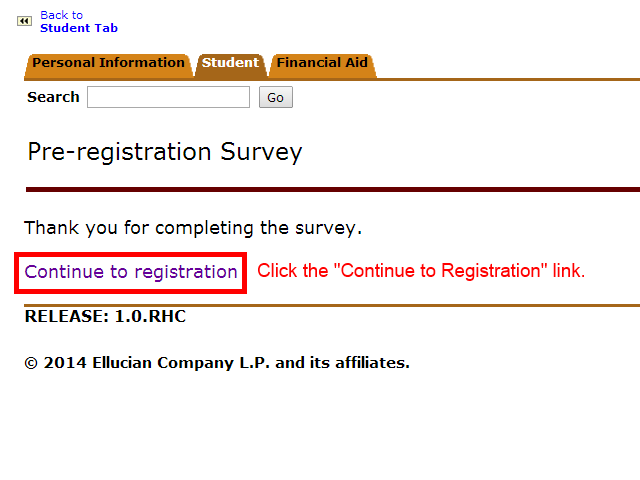
Step 9: Click the “Continue to Registration” Link
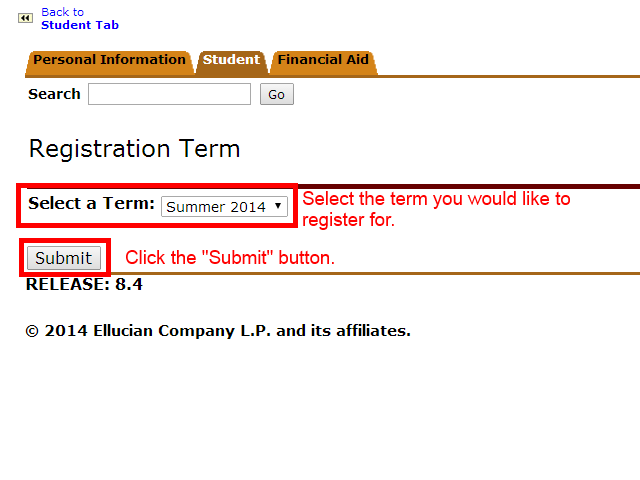
Step 10: Select Your Registration Term
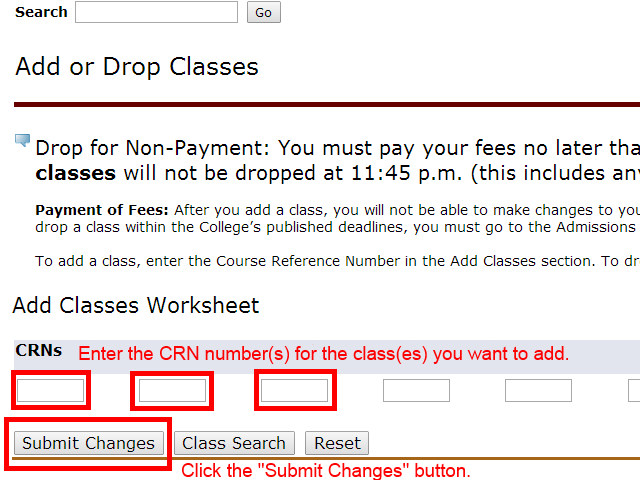
Step 11: Enter the CRN for the Class(es) You Want and Then Click the “Submit” Button
Step 12: Save a Copy for Your Records – You Are Finished Adding Your Class(es)
Just in case there is a problem later on it is good to retain a record that you did add the class. You can print the screen, save a copy of the page on your computer or take a picture with your phone.